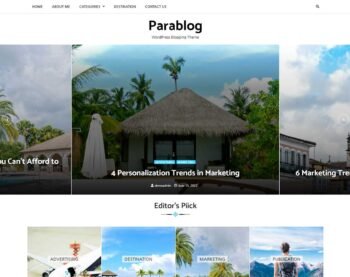
Parablog
Parablog is an ideal WordPress theme with stunning parallax effects to give a whole new look to your website. It is an ideal theme for bloggers and columnists. This theme comes with two archive layouts – Grid, and List Layout. The theme features a minimal, elegant, and mobile-friendly layout, making it ideal for all types of blogs. The homepage features a simple, magazine-style banner slider and a categories section with customizable widget sections. It’s simple to use, cross-browser compatible, responsive, and highly customizable.

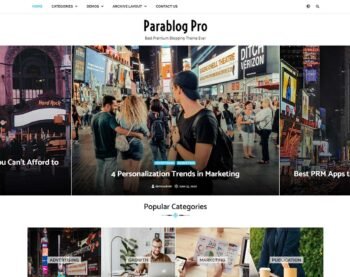


Free vs Pro
| Free | Pro | |
|---|---|---|
| Responsive Design |

|
|
| Demo Import | Manual | One Click |
| Translation Ready |
|
|
| Frontend Dark/Light Mode Switch |  |
|
| Color Option |
|
|
| Parallax Effect Disable | |
|
| Box Layout | |
|
| Google Fonts | 10 Fonts | 1000+ Fonts |
| Page Loader | |
|
| Breadcrumb |
|
|
| Archive List Style | |
|
| Archive Grid Style | |
|
| Sidebar Position |
|
|
| Post Options |
|
|
| Infinite Scroll | |
|
| Enable/Disable Copyright Area | |
|
| Copyright Text Editor | Static | Fully Customizable |
| WooCommerce Compatible | |
|
| Multiple Homepage Demo | |
|
| Homepage Sortable | |
|
| Banner Section | Limited | 3 Styles |
| Banner Slider Autoplay | |
|
| Categories Section | Limited | 2 Styles |
| Posts Carousel Section | |
|
| Grid Posts Section | |
2 Styles |
| Posts Tile Section | |
2 Styles |
| Author Info Widget |
|
|
| Trending Posts Widget | No. of Posts ( Limited ) |
|
| Posts Slider Widget | |
|
| Social Menu ( Icons ) Widget |
|
|
More Features
Besides amazing performance and easy customization, there are many reasons to consider
Demo Import
With the simple plugin, you may replicate the demo of our sites on your site. Then just modify the contents to make it uniquely yours.
Responsive Design
Our theme’s design adapts itself for major devices without compromising the design of the website.
Translate Ready
Though English is the default language of our themes, you can also translate them into your native language. Our themes are translation ready.
No Coding Skill Required
Our theme is built considering the fact that most WordPress theme users love the freedom to build sites on their own. Hence, you need no special coding skills to customize our theme.
WooCommerce Compatible
Our themes are WooCommerce compatible, you can take control over your WooCommerce store. Using our theme, you can easily set up and customize your single product and archive pages easily and add the cart icon in the top bar menu area.
Threaded Comments
The threaded comments option are a great way to help your readers follow the discussion on your WordPress blog. This option also makes replying to comments a cinch.
Homepage Section Sortable
Your website sections can be sorted manually using a simple drag-and-drop function. You may easily rearrange the order of the homepage design by dragging and dropping the sections.
Custom Logo
Our themes support custom logos. Further your brand by uploading an image that will serve as the logo to your website, via the customizer.
Custom Menu
All of our themes support custom menus. Custom menus will guide your visitors to the content they’re looking for on your website.
Set Custom Colors
Set the custom color for the primary and secondary sections to enhance your site’s design along with the custom font color. Then, you can use them on any element on your site by saving them once.
Header and Footer Options
You can edit the top bar, menus, edit the header and footer content, and add widgets and company information.
Typography
Integrated all of Google fonts for distinct design of your site, you can choose among a wide range of fonts for your site.
Breadcrumbs
You can add breadcrumb to present the path of how the user navigated to the current page.
Related Posts
On a single Post, you can choose to display the related post of a similar category, improving visitors’ engagement.
Custom CSS
You can add your own custom CSS to any section, column, widget, or page.
Scroll Top Button
With this floating scroll to the top button, visitors may quickly move to the top of the page, instantly improving the user experience.
Footer Credit options
In our themes, users have the option to edit the footer credit text, like ‘copyright’ and ‘powered by’ text, which is shown at the bottom of a website to align with the goals of their website or blog.